Snowpark Custom Transformation Job
Calibo Accelerate supports custom transformation using Snowpark with Snowflake as source and target data lake.
This support allows you to perform data transformation within the Snowflake ecosystem, reducing data movement. Since compute, transformation, and storage are managed within Snowflake it simplifies the architecture as well as governance. Snowpark supports writing custom transformation scripts using Python, Scala, or Java languages giving you flexibility to select the language of your choice.
To create a Snowpark custom transformation job
-
Sign in to the Calibo Accelerate platform and navigate to Products.
-
Select a product and feature. Click the Develop stage of the feature and navigate to Data Pipeline Studio.
-
Create a pipeline with the following stages:
Data Lake > Data Transformation > Data Lake
Note: The stages and technologies used in this pipeline are merely for the sake of example.

-
In the data lake nodes add Snowflake and configure the data lake nodes.
-
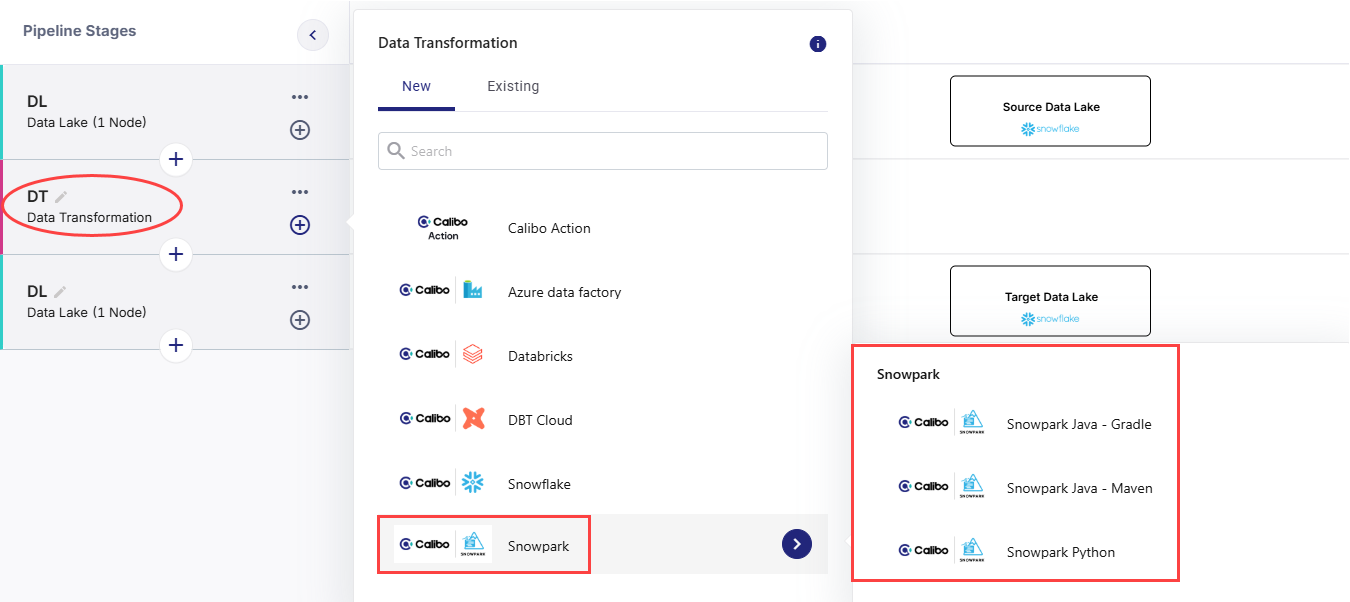
In the data transformation stage, click the arrow for Snowpark and then click Add to add one of the following options to the stage depending on your use case:
-
Snowpark Java - Gradle
-
Snowpark Java - Maven
-
Snowpark Python
-
-
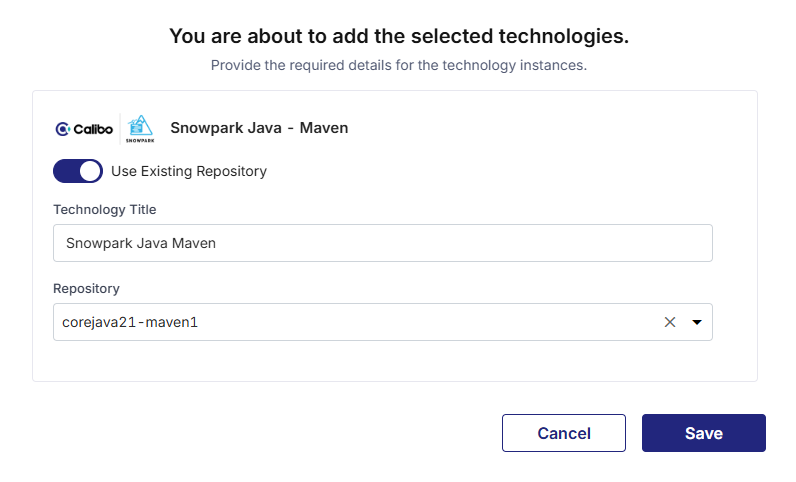
To add the selected technology you can do one of the following:
-
Use Existing Repository - Turn on the toggle to use an existing repository configured for the selected technology and do the following:
-
Provide the technology title.
-
Select a repository from the dropdown.
-
-
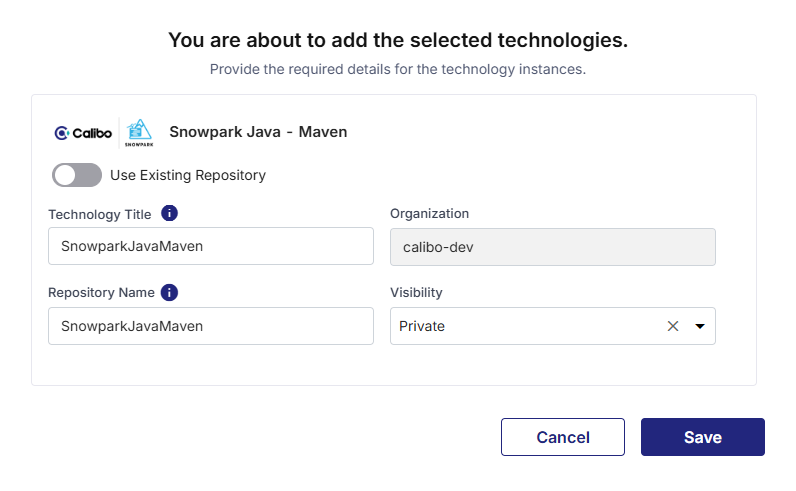
Create New Repository - Turn off the Use Existing Repository toggle and provide the following information:
-
Technology Title - A name for the technology for which you are creating the repository.
-
Organization - The organization that owns the repository.
-
Repository Name - A name for the repository that is created for the technology.
-
Visibility - Specifies who can view and access the repository.
-
-
-
Connect the data transformation node to the source and target nodes.
-
To replace the placeholder code with your own custom code. do the following:
-
Click Source Code and open the main.py file.
-
Click Edit.
-
Either replace the complete code or replace the placeholders Table 1, Table 2, Column 1 and Column 2 with actual values.
-
Click Commit Changes.
-
Open the test_main.py file and repeat steps 3 and 4.
-
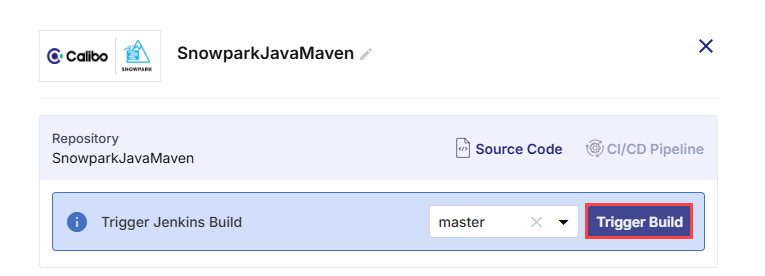
- Click the data transformation node and select a branch on which you want the pipeline to be built and then click Trigger Build. Click Refresh for the latest status on the build.
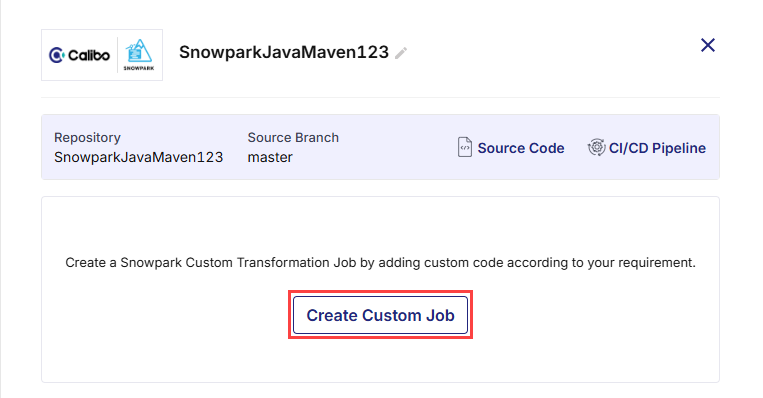
- Once the Jenkins build is complete, click Create Custom Job.
-
Complete the following steps to create the Snowpark custom transformation job:
 Job Name
Provide job details for the data transformation job:
-
Job Name - provide a name for the data transformation job that you are creating.
-
Node Rerun Attempts - this is the number of times the pipeline rerun is attempted on this node, in case of failure. The default setting is done at the pipeline level. You can select rerun attempts for this node. If you do not set the rerun attempts, then the default setting is considered.
-
Fault Tolerance - Define the behavior of the node upon failure, where the descendent nodes can either stop and skip execution or can continue their normal operation. The available options are:
-
Default - If a node fails, the subsequent nodes go into pending state.
-
Proceed on Failure - If a node fails, the subsequent nodes are executed.
-
Skip on Failure - If a node fails, the subsequent nodes are skipped from execution.
For more information, see Fault Tolerance of Data Pipelines.
-
Click Next.
 Repository
-
In this step, Repository Name, Organization, Visibility fields are populated, based on the provided information.
-
The Repository Path is created. Click to navigate to the repository.
-
Under Select Files click the dropdown and select the custom code file that you have created.
Click Next.
-
-
Click +Add to add a procedure. Add the required information under Create Procedure.
- Repository File Name - Select the Snowpark script file which contains your custom transformation logic.
-
Procedure Name- Provide a name for the procedure.
-
Replace if exists-Turn on this toggle if you want to replace an existing procedure having the same name with the new one.
-
Comment - Add a comment for the procedure.
-
Depending on the language used to create the custom code, you may see the following options:
 Java - Gradle
-
Language Identified - This is automatically populated based on the added procedure.
-
Language Version - Select the language version from the dropdown.
-
Class Name - Specify the name of the file that contains the Java class.
-
Method Name - Specify the procedure inside the class.
-
Handler - Specify the handler for the class.
-
Returns - Specify the output of the method.
 Java - Maven
-
Language Identified - This is automatically populated based on the added procedure.
-
Language Version - Select the appropriate version of the language that you are using for coding.
-
Class Name - Specify the name of the file that contains the Java class.
-
Method Name - Specify the procedure inside the class.
-
Handler - Specify the handler for the class.
-
Returns - Specify the output of the method.
-
Add Run Parameter - provide the following information:
-
Parameter name
-
Datatype
-
Value
-
 Python
-
Language Identified - This is automatically populated based on the added procedure.
-
Language Version - Select the appropriate version of the language that you are using for coding.
-
Function Name - Specify the function or stored procedure.
-
Handler - Specify the handler for the procedure.
-
Returns - Specify the output of the function.
-
-
Click Generate Procedure.
-
Click Create and Add Procedure.
-
Click Complete.
-
Click Publish to publish the pipeline with the changes.
-
Click Run Pipeline to run the job or pipeline.
-
In case the job fails, click Source Code. Based on the error, edit the code and commit the changes. When you click the Snowpark node, a message is displayed:
"A new code commit has been detected after the last build. Rebuild the pipeline to reflect the new changes." Click Rebuild.
In this step, you add the procedures for the custom transformation job. To add a procedure, do the following:
| What's next? Snowflake Custom Transformation Job |